I am going to run through my drawing process with you, which I hope will help you to improve your pencil drawing skills. I am concentrating on portraits here, but you are welcome to adapt this advice to any subject you think it could apply to.
I will be assuming a basic knowledge of art in general, and if you need to learn more, there are plenty of websites, and you-tube videos online which can help you.
The drawing process can involve a quick sketch in under ten minutes or, more usually it can run on for hours, so please have patience. When I am drawing, each portrait will take approximately five hours of work, with lots of breaks in between. I often find that working for an hour, and then leaving your drawing for a day or so, gives you a fresh insight the next time you sit down to it. After the break you might see some small mistakes that can be corrected easily, rather than working right through to the end of the drawing and finding that it needs to be completely re-worked.
However, if you would prefer to complete your drawing in one sitting, feel free to do so.
Equipment
Drawing can be a very affordable hobby. The most basic equipment you need is a pencil and paper. However, there are some items which can really help to improve your results.

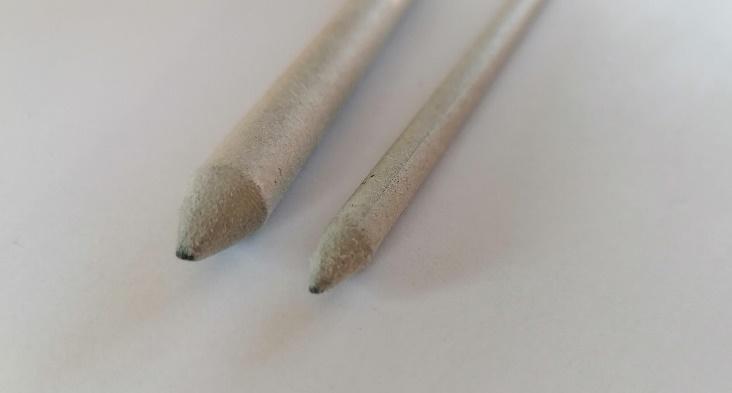
Pencils – Graphite Pencils are graded from hard to soft, with the harder graphite giving a lighter finish, and softer being darker. They are graded in H (hard) and B (soft) and the common HB pencil sits right in the centre of the range. I use a selection of pencils from 2H to 5B as that is the best fit for my style of drawing. The 2H pencil is ideal for lightly sketching outlines, as it is easy to erase if mistakes are made (just be careful not to press too heavily as that can indent the paper and cause problems). I then gradually add details moving through the B range, getting darker as I progress.

Paper – Quality counts. Obviously, you can still draw on cheap copier paper if that is what fits your budget, but it tends to be very flimsy, creases easily and it has a high acid content which causes it to yellow over time. A good sketch pad, cartridge paper etc. will give a better finish. I personally like a slightly textured paper, as the graphite takes to it well and I like to see the texture and grain of the paper through my artwork. A smoother Bond paper will give a smoother finish. It’s just a matter of preference. I would suggest trying different papers to find the one you like the most.
Blending Stumps – This is a pencil shaped piece of card, and as the name suggests is used for blending. They are ideal for shadows or areas where you need a smooth transition from dark to light. I used to use my fingers, but apart from being messy, it can also lead to problems with the oils in your skin causing the graphite to clump and look streaky. The Blending Stump gives a smoother blend and the point is much finer, so it can also be used to draw fainter details such as freckles.

Brushes – The softer the better. I use old Make-Up brushes in different sizes for blending. They have a similar use to the blending stump but are used for larger areas and a softer effect. They are also good for removing the residue from your erasers.
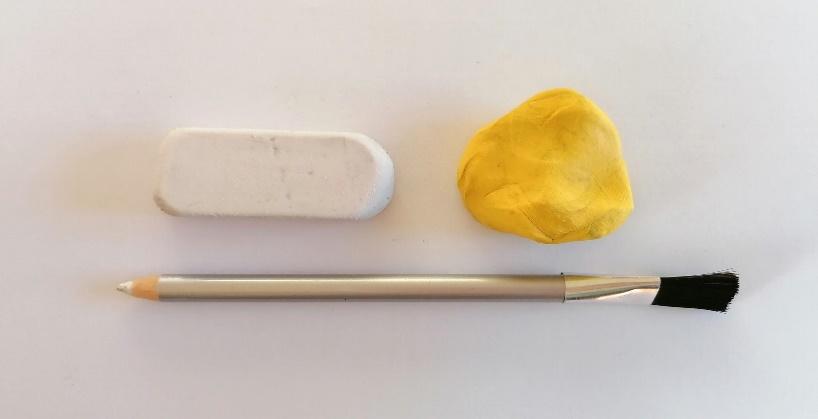
Erasers – Once again, not all erasers are created equal and I use a selection of three different types; An Artists Eraser which is good for removing large areas and heavier lines; A Putty Eraser. This is moldable, so it is good for shaping into a point or disk for fine lines, it is also sticky, which is good for lifting the graphite to lighten areas which are darker than you need; And a pencil eraser, which as the name suggests, is a pencil, but instead of graphite, there is an eraser running through the centre of it, this is good for fine erasing, and can also be used to draw highlights over shaded areas. You will notice that the one shown has a brush at the end. This is only good for removing residue. The bristles are too coarse for blending purposes. Avoid cheap, coloured or novelty erasers where possible. These can sometimes damage the surface of the paper, making it difficult to get good results from your final drawing.
As I said at the start, you might only use a cheap pencil and paper and still get excellent results, but the equipment I have listed above will help you to perfect your drawing and hopefully get a portrait you are much happier with. The only other thing you will need is a good quality pencil sharpener.
References
Now that you have your equipment, you will need to decide what or who to draw.
You may decide on drawing a family member or a celebrity. Always start with a good, sharp photograph as a reference. Famous faces are very easy to find with an internet search and you probably have plenty of photos of your family. If not, you can always take a new one if the person is willing.
Try to find a photo with your subject looking straight ahead, and with a neutral expression. It will be more symmetrical and therefore easier to draw. With practice you can progress to new angles and expressions, but this is probably the best place to start.
An important thing to remember if you plan on selling your drawings, exhibiting or using them for public display, is that there are issues regarding copyright. Celebrities have rights to the use of their own image, and artists and photographers own the copyright of their work, even after they pass away, the estate still holds copyright for 70 years after the artist’s death. Because of this you must get permission from the relevant people.
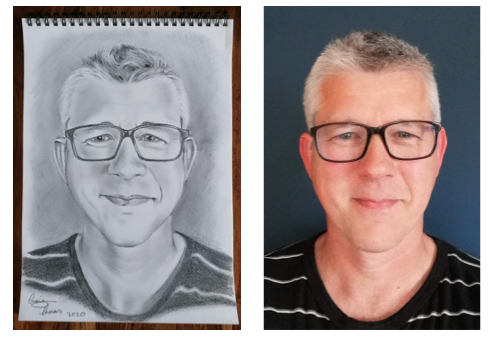
If you are not making money from your art, it can come under the blanket term of “Fan Art†and you are ok to produce it. I’m not a solicitor and was getting such a headache looking into this that I gave up and decided to use a self-portrait. So, for the purpose of this post you will be watching me, create me.
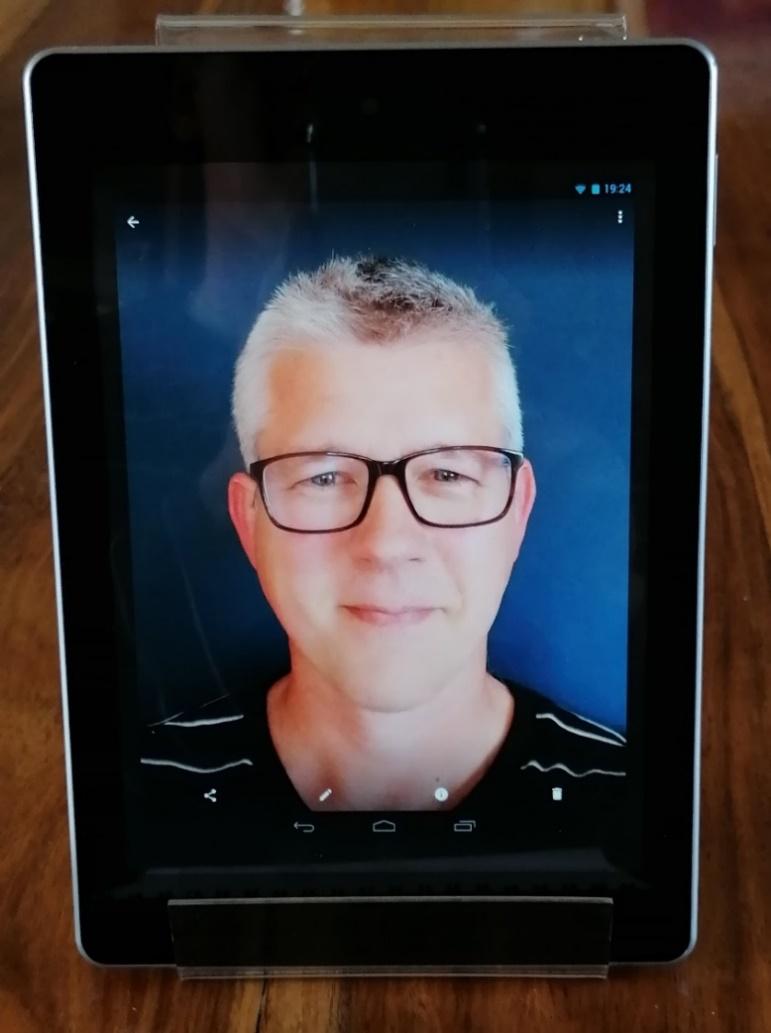
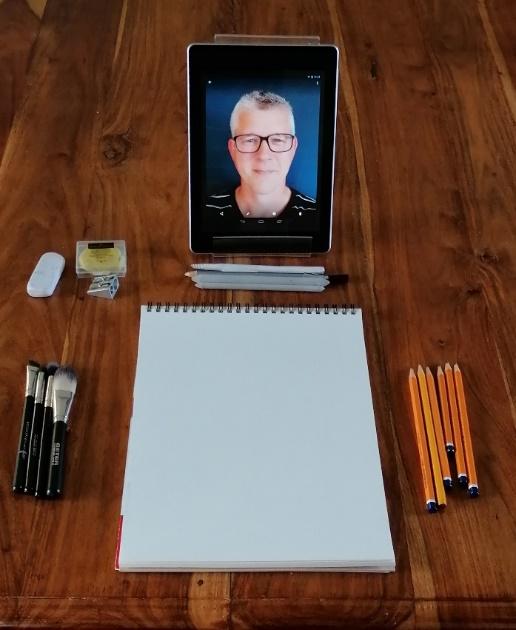
The reference photo can be printed or digital. I do find that the bigger the image the better. I use an old tablet, which is not much use for anything else. The big advantage of a tablet being that you are starting with a larger image and can then zoom in if you need to see more detail.
One more thing to be aware of with your reference image, is to prop up your photo/tablet for a more natural view. I have a Perspex stand which I use for this, but you could easily use something else such as a wall, or stack of books etc. If your reference image is laid flat, your view of it will be distorted and therefore your drawing will be also.
Drawing
Now that you have your equipment ready, your reference photo out in front of you, and you’re raring to go. It’s time to start drawing.
I draw freehand, but if you prefer to use a grid overlay, that is a perfectly acceptable technique too and can help with accuracy.
As with anything, preparation is the key. If this first step goes wrong, your drawing will be extremely difficult to correct, so take your time to get this part right. The proportions are extremely important, as everything else builds from this first sketch.

Starting with the 2H pencil, I will sketch a rough outline of the face, beginning with the oval to get the size and shape of the head correct. Aim at placing this towards the top of the page to leave room for the neck and shoulders.
I then move to dividing lines, the eyes are placed halfway down the length of the head, with the nose halfway across.
The bottom of the nose should be just above halfway between the line of the eyes and the bottom of the chin, and the mouth just above halfway between the bottom of the nose and bottom of the chin.
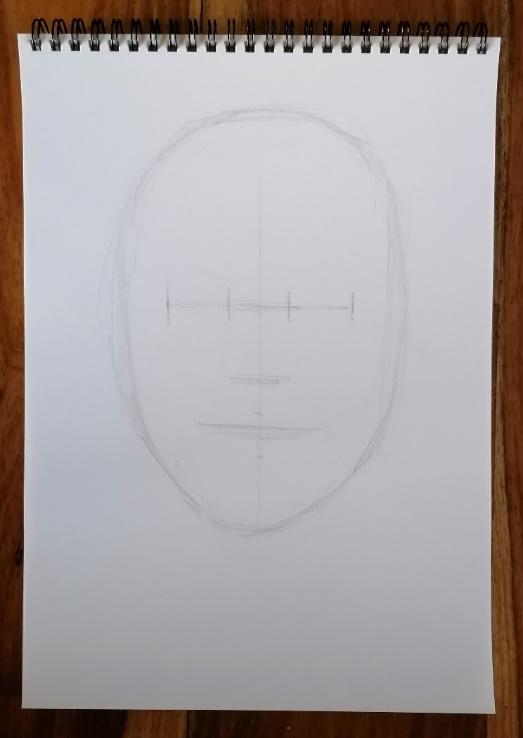
Now we can start to add in the shape of the eyes, nose, mouth, and a rough working of the hair, neck and shoulders. Divide the width of the head into five equal portions along the centre line. From the centre working outwards are the nose, eyes and temples.
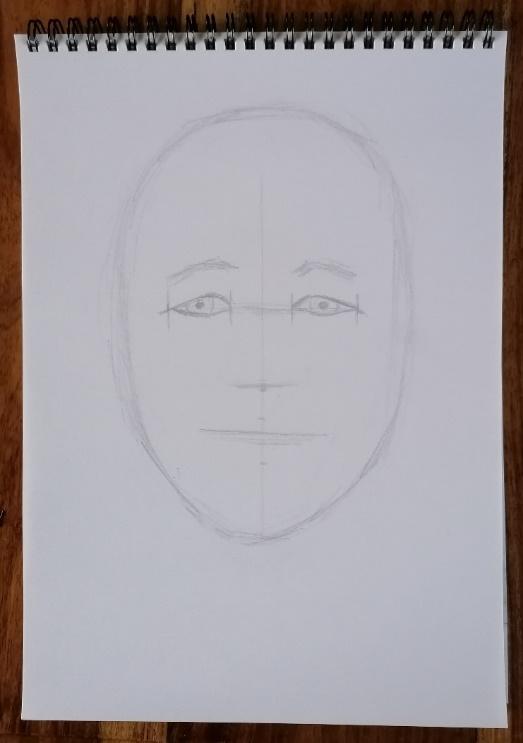
Working with your reference photo, draw an almond shape guide of the eyes, try to keep the exact shape accurate, then draw a faint guide for the eyebrows.

Everything else can be done freehand, provided they align with your guidelines.
I will often rub out and rework different areas, until the whole head looks well proportioned. This is where I usually take my first break. Returning to make corrections before I move to the next step.

Adding the details
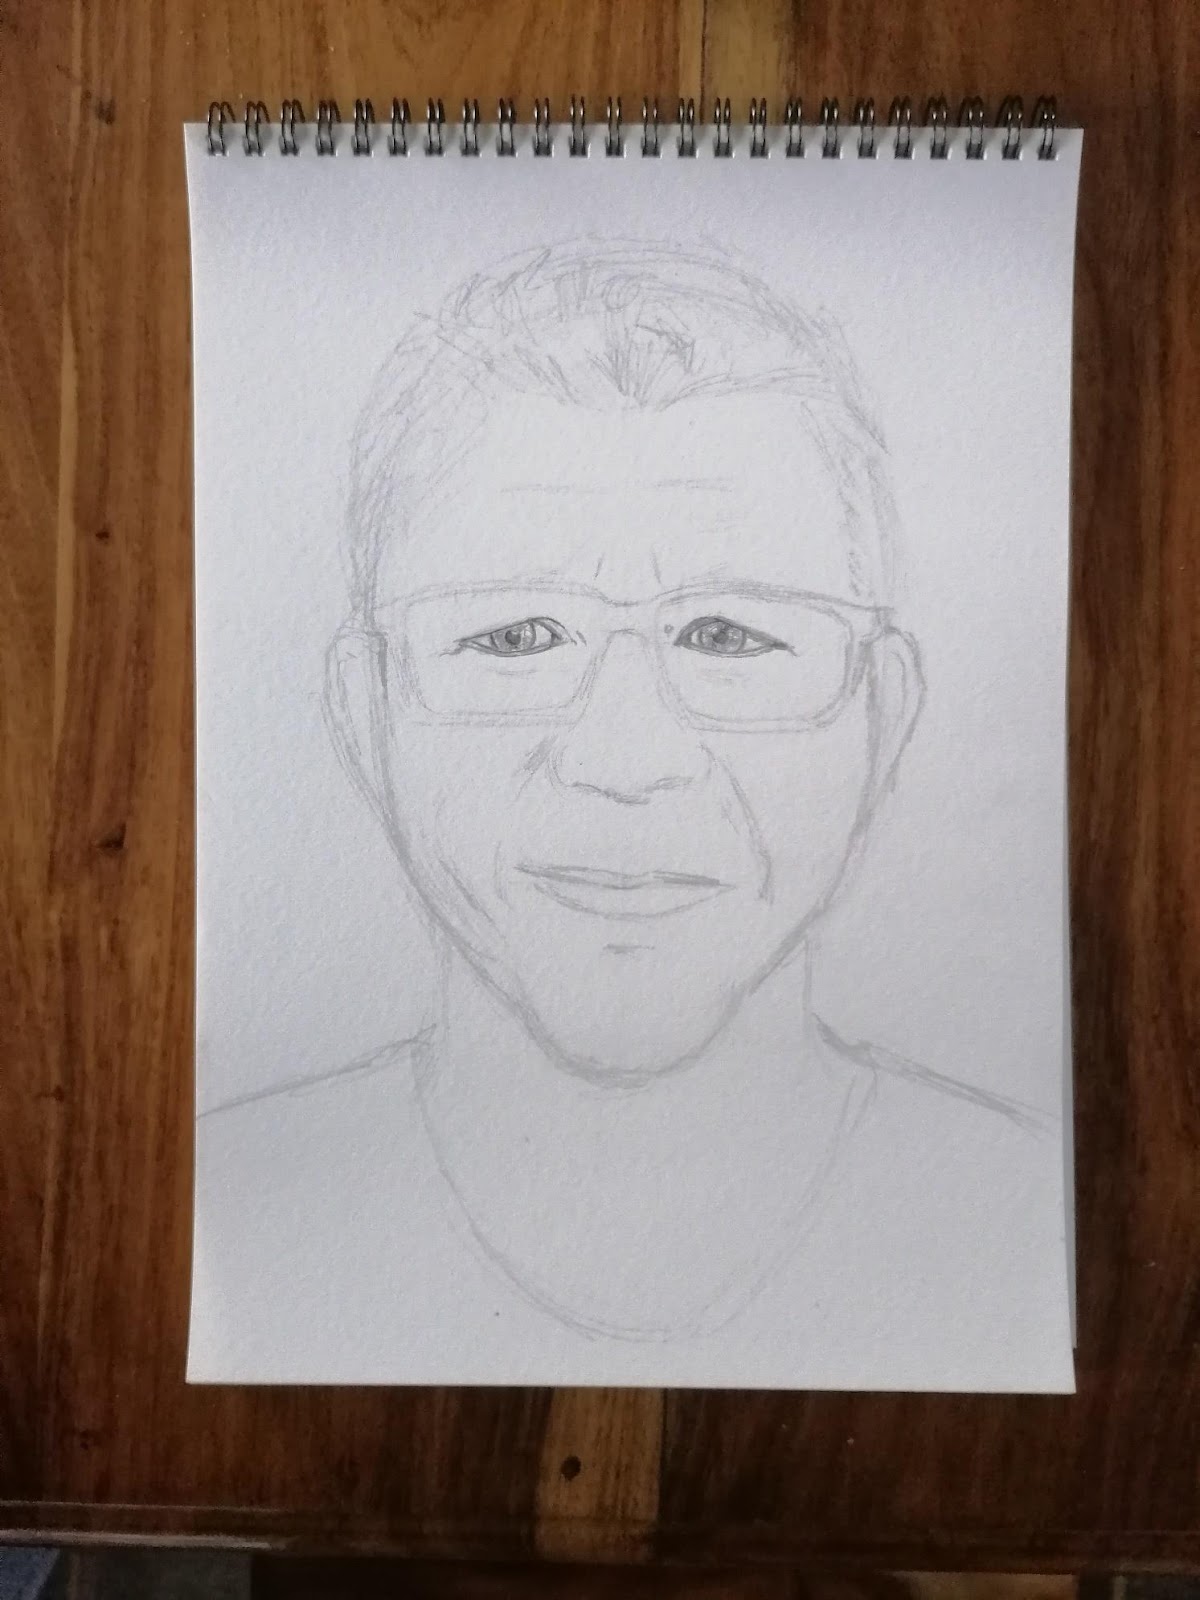
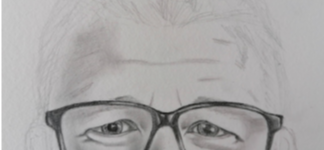
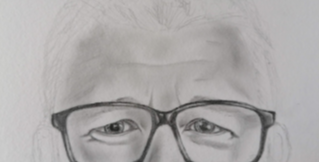
Now you have your groundwork done. It may look rough and ready, but you should have at least a vague similarity to your subject and be able to see where it is going.
When I returned to this drawing, I noticed that the head looked a little too round. I have extended the height of the hair and adjusted the jawline slightly. I have also erased my guide-lines and I’m ready to carry on.
It’s time for the details. I usually start with the eyes, as I feel they are the most important part of a person’s face. If you prefer to start with the mouth, nose or hair, that is up to you. Concentrate on that detail alone, until you feel you cannot improve it anymore, but be careful not to overwork your drawing. Start light and build up layer upon layer of detail, getting darker each time.
Eyes
Begin with the HB pencil, draw the circle of the pupil, and the line of the iris parallel to that. Don’t forget to mark out the highlight to give that liquid look to your eyes before you start to darken the pupil. Draw in the darker lines of the eyelids, and wrinkles at the corner of the eye.
Lightly shade in the shadow areas around the eye, and then run a blending stump, over the areas which need a smoother finish, the iris, eyelids and shadows.

The next pencil is the B, darken the pupil, the edge of the iris and the lines around the eye.Â
You might want to tidy up some of the smudges from when you blended the shadows. The Putty Eraser is good for this. Knead it, until it goes soft and sticky, then mold it into a disc.Â

Use the flat edge of the disc to erase fine lines, and mold it into a blunt point to gently touch areas which just need to be lightened.
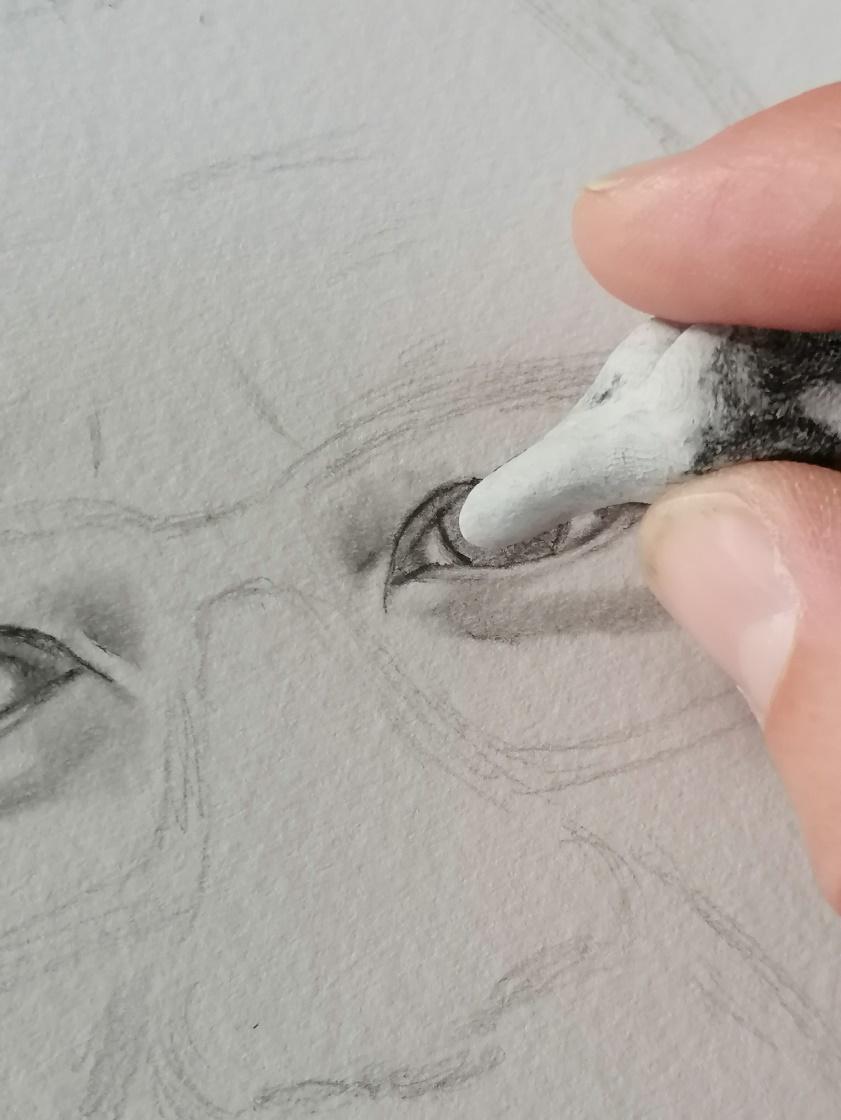
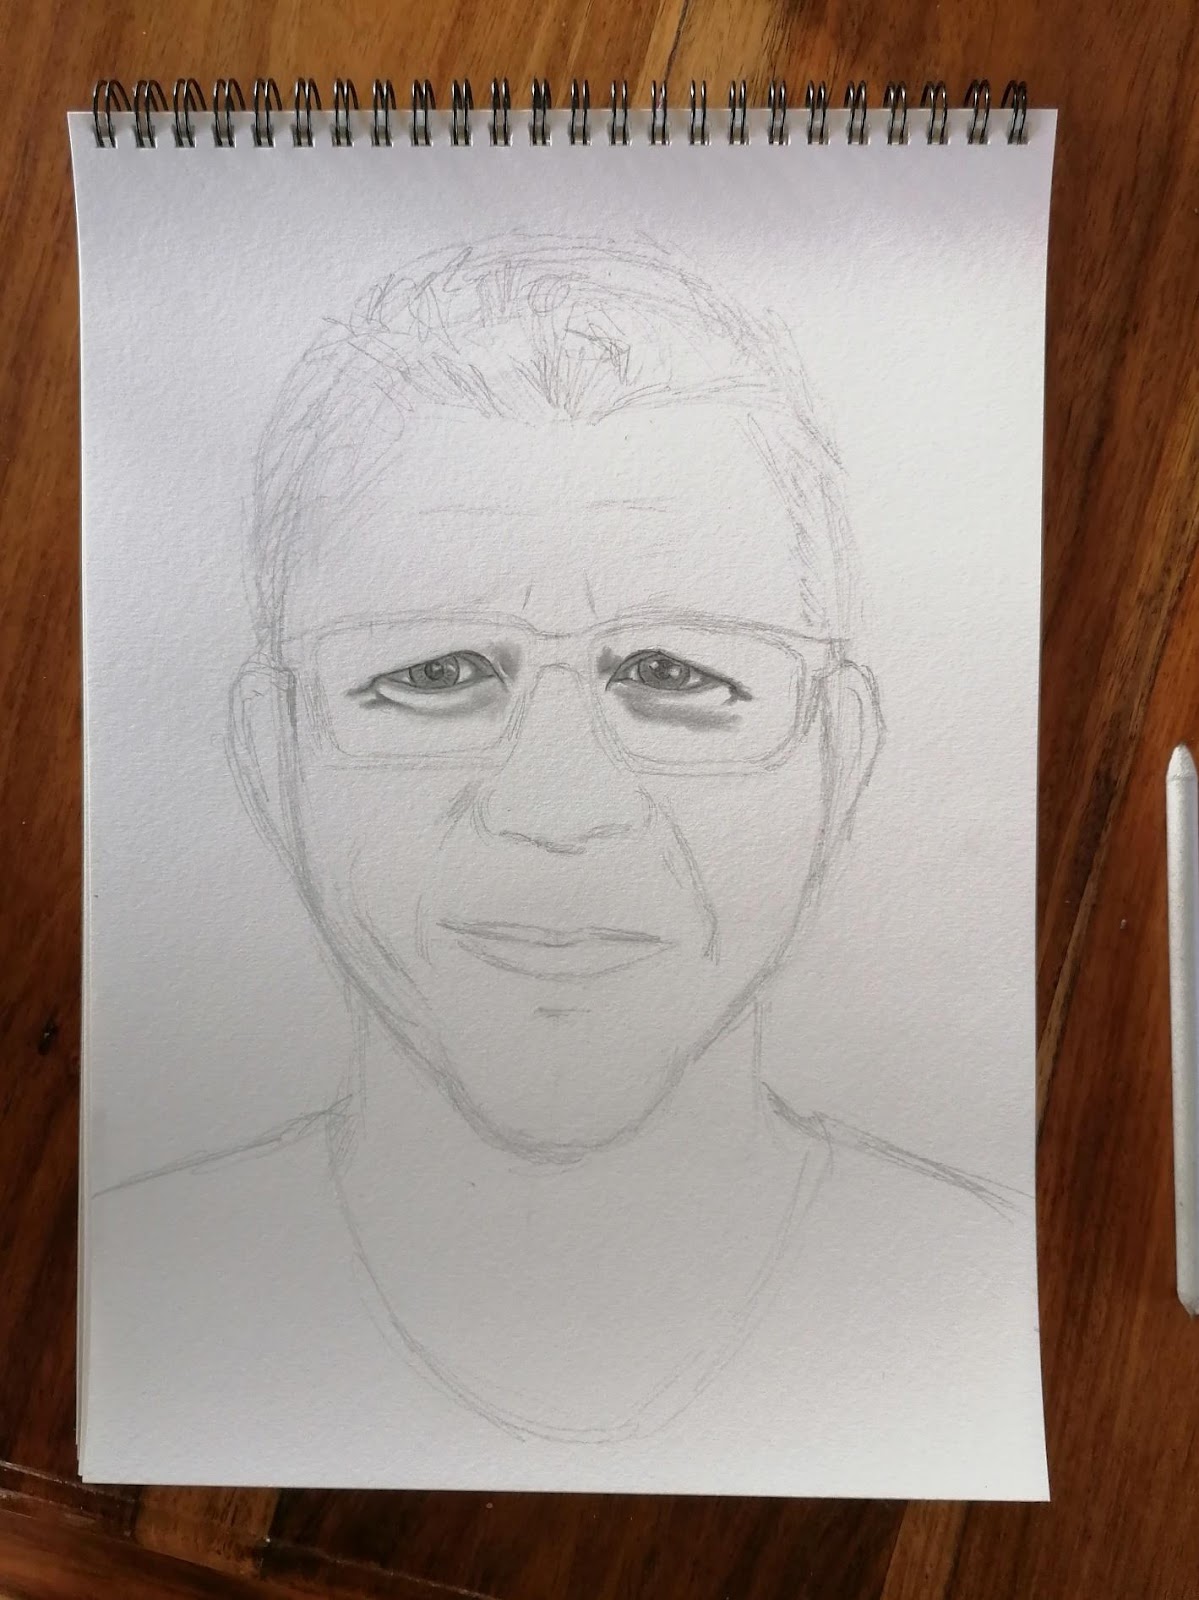
With the 2B pencil, darken the pupils and lines around the eyes further, adding some flecks around the iris. Use the blending stumps as required to improve the shading.
I chose to pause here. I am happy with the progress so far, and will return to the eyes, as the drawing becomes more complete.
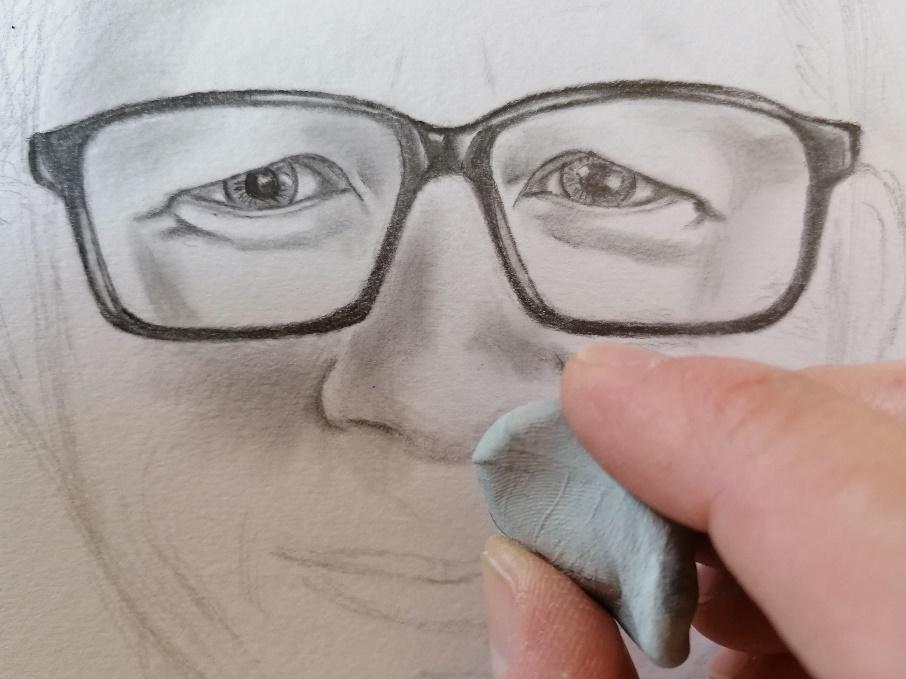
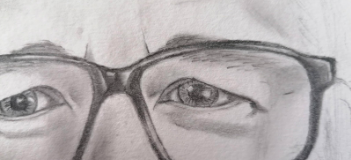
Glasses
You’ll need a steady hand for glasses as they need straight, clean cut lines to be accurate. Starting with the HB pencil, tidy up the lines of your earlier sketch.
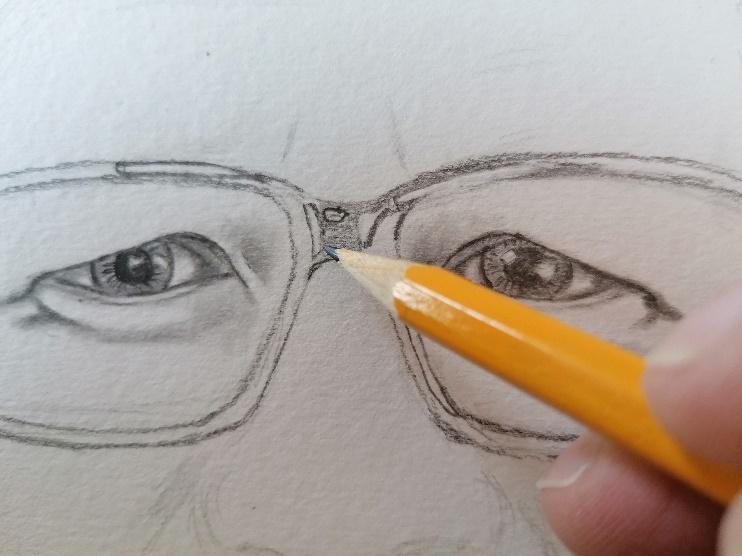
Remember to mark in the highlights, as it can be difficult to erase them cleanly. It’s much better to avoid darkening them in the first place.

Using a B or 2B pencil, shade in the dark areas. Then using a blending stump, rub over the same areas to give a more uniform finish. Remember to avoid the highlights as much as possible.
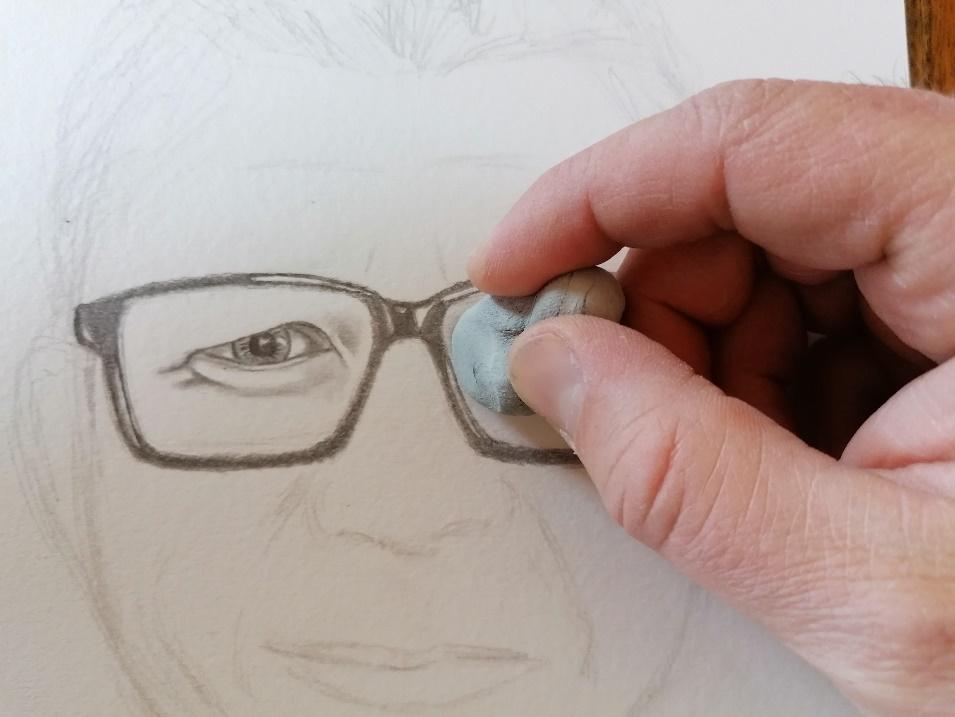
Using your putty eraser, again molded into a disc, tidy up the edges and the highlights.

You can go over the darker edges with a 2B or 4B pencil if you wish, to give more of a 3D pop to the frames. Be careful not to overdo it.
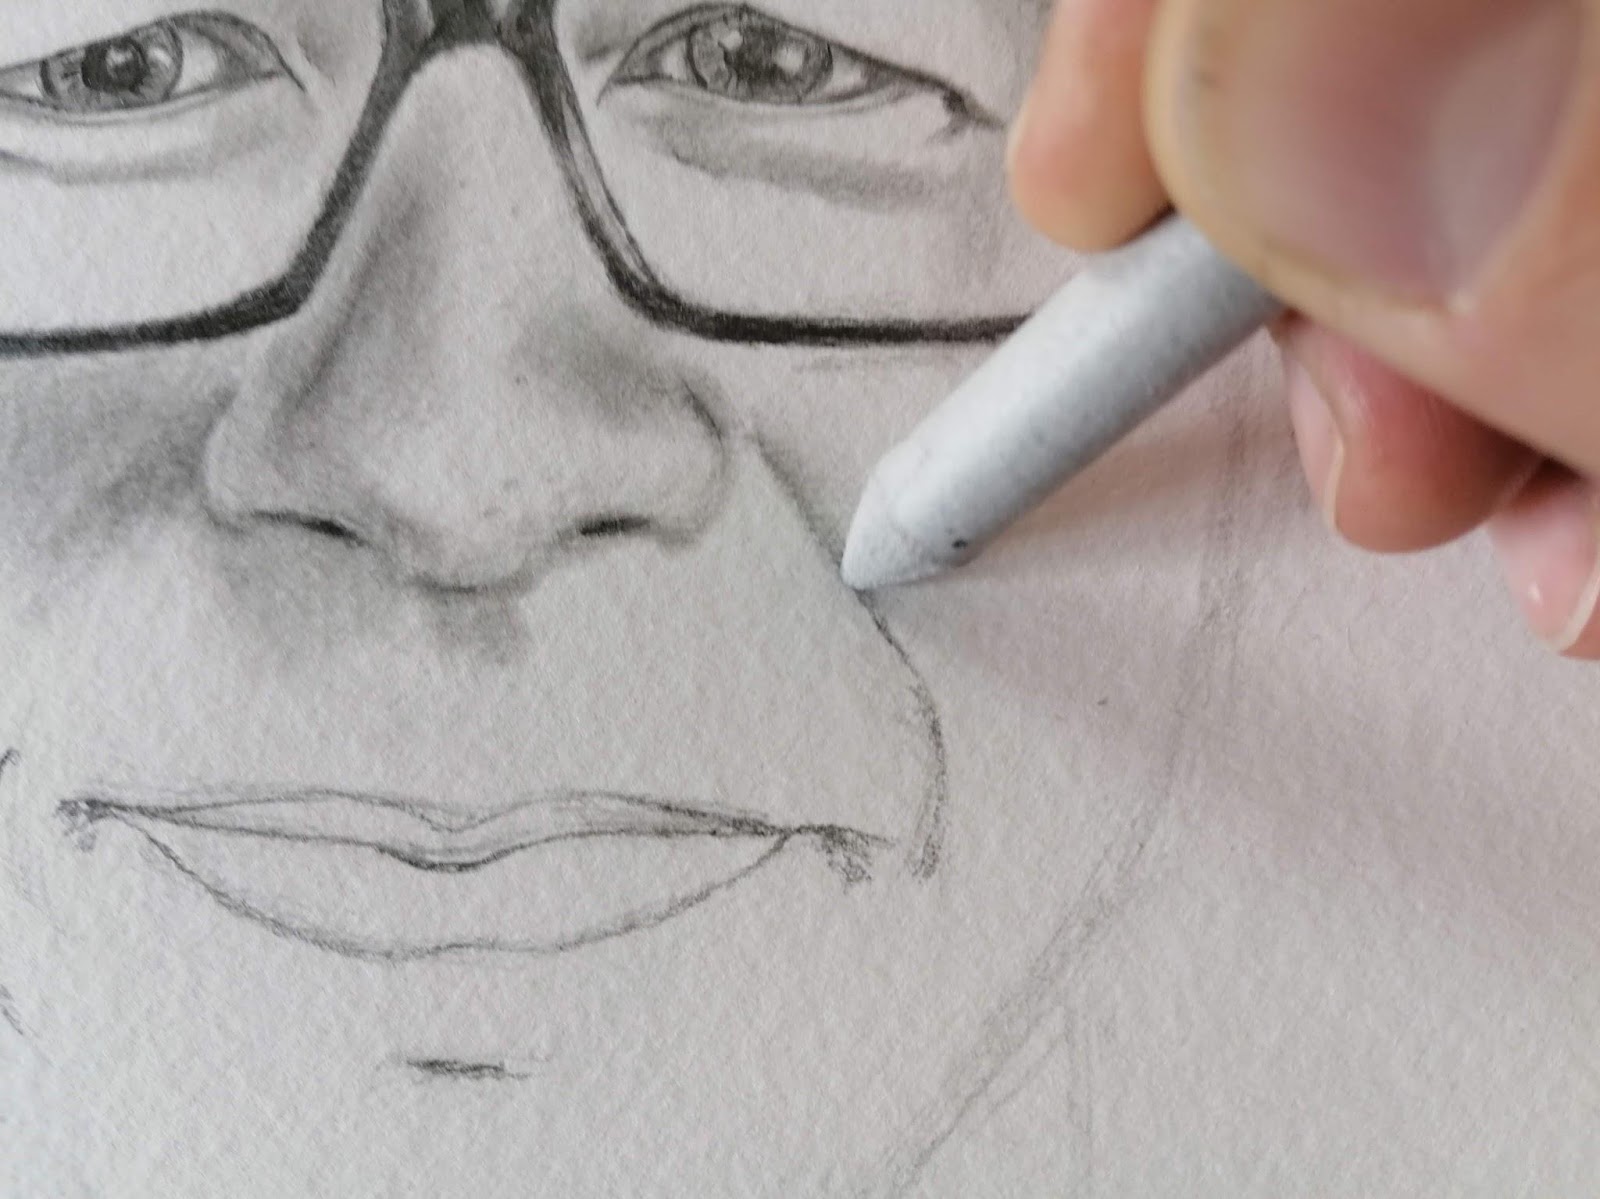
Nose
Study your reference photo here, the nose is where I make the most mistakes, too long, too small, too narrow etc. and it will throw off the entire look of your portrait. You should already have a rough line for the nose, but feel free to adjust this if it’s not looking right.Â
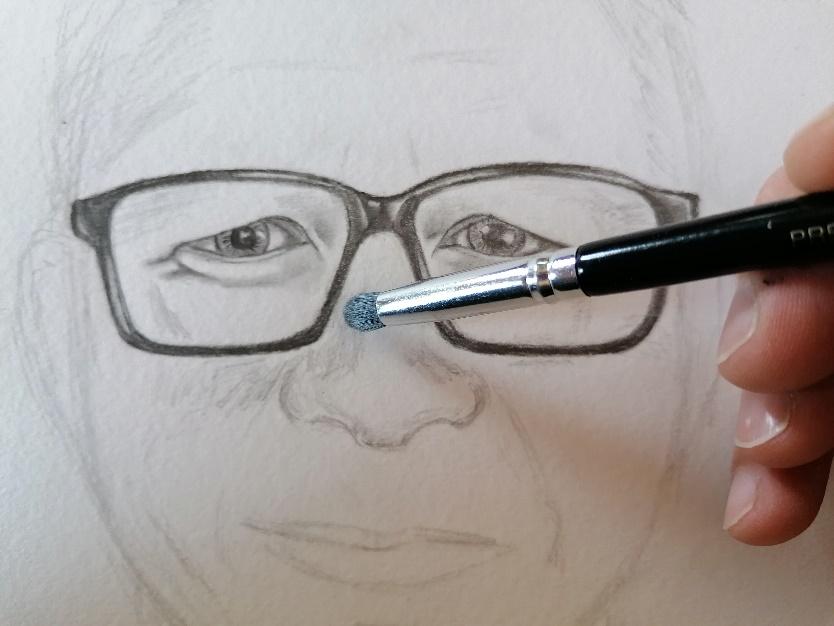
Start with the shadows, lightly shading with the HB pencil, followed by blending with the make-up brushes. You could use blending stumps here, but the brush is gentler and gives a softer blend over the large areas.Â

Now use the B pencil to mark in the nostrils and the creases around either side of the nose. Use the blending stump to push the graphite into the shadows and away from the highlights, then use the 2B to darken the nostrils.
Back to the putty eraser, molded into disc form for the highlights, then make it a blunt point again, to lighten the areas which are too dark.

There is still a lot to do, but your drawing should be starting to come together.
Time for a break. We will come back again later, with fresh eyes and proceed with the mouth.
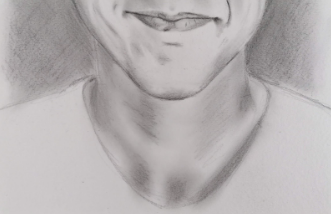
Mouth
The Mouth is a tough one to position. It varies in shape and size depending on the expression. This will take a judgment call on your part, so keeping your reference photo to hand as you draw will help greatly.

Using the HB pencil, start with the line of the mouth, then lightly draw in the shape of the top lip, and then the bottom lip.

Still with the HB pencil, draw in the wrinkles and creases around the mouth. Always remembering to work lightly and that it’s better to build up layers, than to try to remove them.
Once again we’ll use the blending stump, shading around the creases. This softens the line of the wrinkle, and also adds a bit of shading.

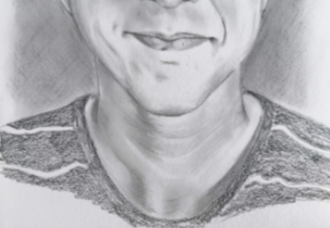
Here you can see that I have added a bit more shading to the side of the top and bottom lips, blending with a make-up brush as I went. I have also softened the creases around the mouth with the stump, and lightly shaded the darker skin of the lips.

Use the putty eraser to lighten the highlights of the lips, and the B pencil to shade in the darker areas.

The 2B pencil should be soft enough to darken the line of the mouth and the creases at the corners. also gently draw in the creases of the skin to add a bit of realism and life to the mouth.
Forehead
As you can see I’ve started to add detail to the forehead, including the eyebrows. This is a fairly simple stage, which is mostly blending.
Begin with the eyebrows, gently shading in the darker areas with the HB pencil. Then add the wrinkles, and shadows to emphasise the shape of the head.
Once again we need a soft blend with the make-up brush. This has come out a bit dark, but we can lighten it with the putty eraser.

Mold the eraser into a rounded shape, and just dab it onto the areas which need to be lightened.

Back to the eyebrows and blending with a stump to get the shape right.
Using the B or 2B pencil, gently draw in the dark lines of the wrinkles and the hairs of the eyebrows.Â
Draw the hair by placing the pencil at the base of the hair, and lifting it as you get to the end. Almost flicking the pencil across the length of the hair.

Here is the progress so far, and it’s time for another break.
Hair
The first step to hair always looks rough and ready, but we are really just giving a guide to the style and direction of the hair, and the areas of dark and light.

Once the hair is marked out, brush over it with one of the make-up brushes to smooth out the shading.

I have shaded in the background on my drawing, simply because my hair is so grey at the sides and it helps to define the edges of the head. If your subject has dark hair this wouldn’t be so necessary, but it can add to the overall effect.

Once again, go to the putty eraser to clean up the edges.

The hair on it’s own can look a bit crude, but as part of the whole drawing it works well. I would choose to leave it for now and come back to it, but only if you feel it needs it at the end.

Ears and Jawline
Back to the HB pencil to draw the shape of the ears, and to define the jawline and chin. Then to add shading around the lower half of the face including the cheeks.

Here I have blended the shadows and the edges with a mixture of make-up brush, and blending stump. I have also worked over the darker areas with the putty eraser to lighten anywhere that looked too dark. The edges of the ears in particular.

Now I have darkened the edges where needed (mostly chin and jaw) and extended the shading in the background. This helps to exaggerate the highlights and separate the face away from the page

I have touched around the details with the 2B pencil, mostly at the chin, and ears, with more blending of the shadows, and background with brushes and blending stumps.
Neck and Shoulders
Onto the neck area, which involves a lot of shading and blending. Again we will start with the HB, moving on through B and 2B with blending in between stages.
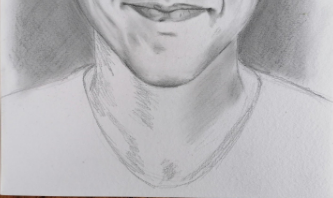
Again a soft blend with the make-up brush…
…Followed by more shading with the softer pencils, and further blending.
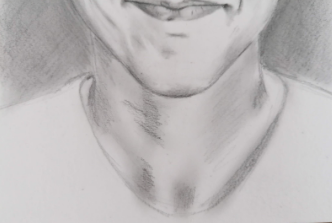
Once the final blending of the neck is done, go over the highlights with either the pencil eraser or the putty eraser. Then move onto the shoulders. I have shaded the black top with a 4B (don’t forget to leave space for your signature).Â
To finish off, I will blend with the make up brush, and repeat with 4B or 5B and more blending, until I am happy with the result.
Now that all your work has paid off and you have finished your drawing, put your name in the space you left especially for it, and you are done.
I hope you found that easy to follow, I know there are a lot of steps to it. I would love to see your efforts, so please share them in the comments.


Leave a Reply